VPN connection
A VPN connection makes it possible to get direct access to the University's network. By connecting through VPN you can for example use:
- E-resources of the National Library.
- Snara can be used without a VPN by signing into your Ugla account, press "Meira", "Innskráning" and choose "Microsoft".
This service is only meant to be used for restricted websites like the aforementioned, other websites like Rúv are blocked to reduce the load on the server.
You can not connect to the VPN while being connected to the internet at the university.
Please note that hotels often block the use of VPN services on their networks.
Set up instructions
- Start by downloading OpenVPN 2.5.3.
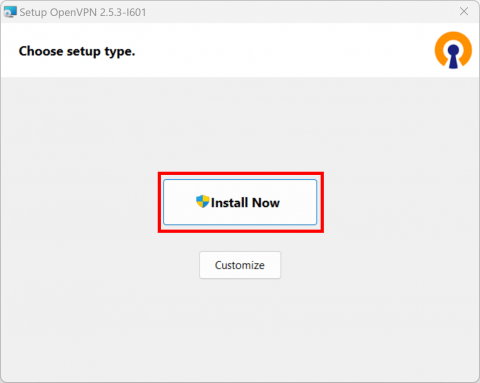
- Open the file and click "Install Now":
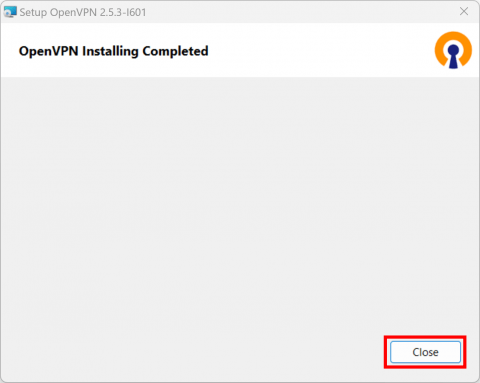
- After the installation has finished click on close:
- Click Start, type in "OpenVPN GUI" and click the OpenVPN GUI app to open it:
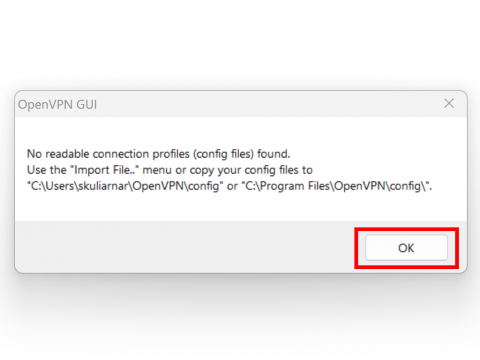
- This error message will pop up the first time you run the program, click "OK":
- Next you need to download the client file for the University VPN. You will need to right click on it and select "Extract all"
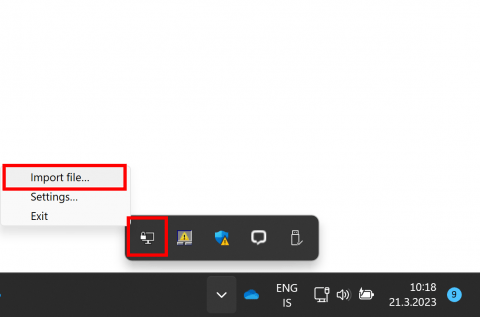
- One the application has been opened you will see the OpenVPN icon in the bottom right corner. Right click the OpenVPN icon (you might need to click the arrow to see it) and click "Import file...":
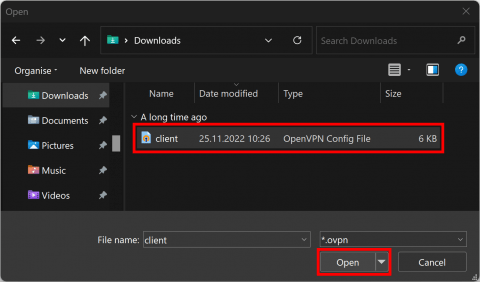
- Find the client.ovpn file you downloaded in step 6 and click "Open":
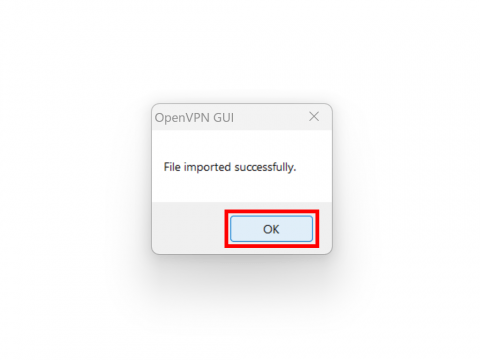
- Click "OK":
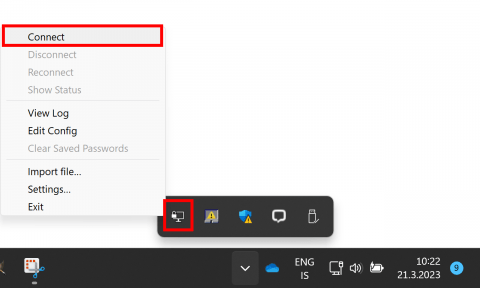
- Right click the OpenVPN icon again and click "Connect":
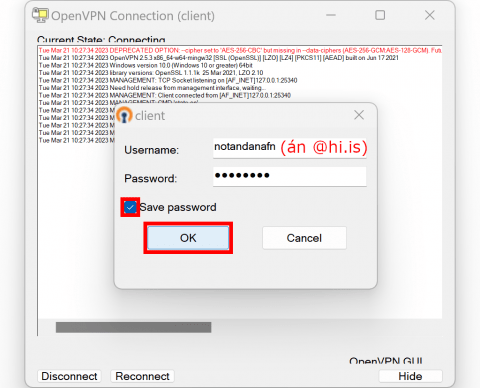
- Finally, you will be asked to input your username and password. Type in your University username without the @hi.is ending and password, check "Save password" to avoid having to type it in every time, and click on "OK" to connect.
Here are instructions for VPN connection with MacOs X version 10.12 (Sierra) and up. Sierra no longer supports PPTP connections so a VPN software is required to connect to the University's VPN. In this demonstration we will use OpenVPN.
Our VPN client doesn't work with the most recent versions of Tunnelblick. It is important not to update it.
NOTE that you only need to follow those steps once to setup the connection. After that you only need to do steps 11 and 12 to connect to VPN.
- Start by downloading the client setup it will be used later.
- Download Tunnelblick version 3.8.8b from their website. Do not update to version 4, as it doesn't work with our VPN.
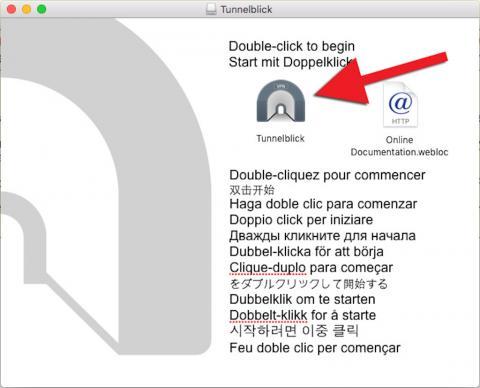
- Go to Downloads and open the Tunnelblick file. Double-click on the Tunnelblick icon:
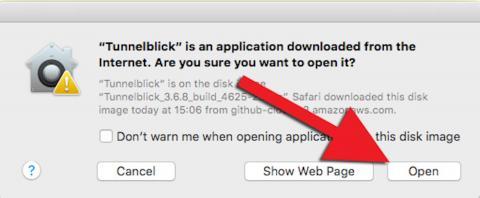
- Click on "Open":
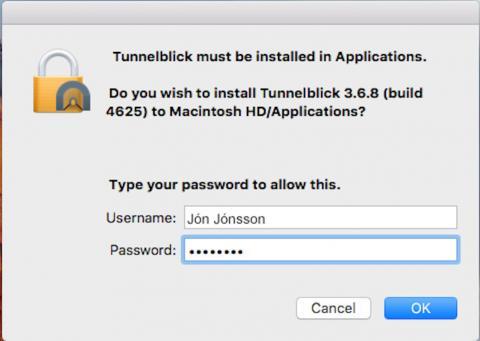
- Type in the password for the device and click "OK":
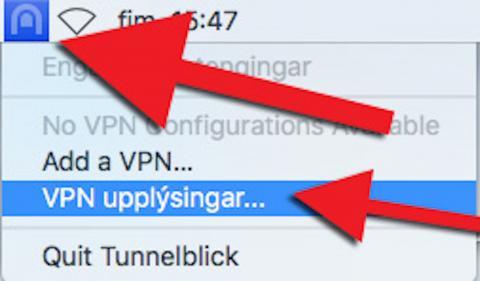
- Now the VPN client is installed on your device and you will see its icon at the top right corner, click on it and choose "VPN Details":
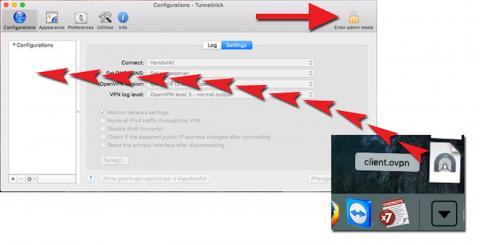
- Then this window opens. Drag and drop the "client.ovpn" file from the Downloads (or where you saved the file to) into the Configurations box. You might need to "Enter admin mode" for this to work. You do that by clicking the lock-icon at the top right corner:
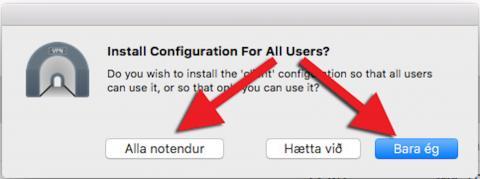
- Here you will need to choose if the file should be installed for all users or just the user signed in:
- Type in the password for the device and click "OK":

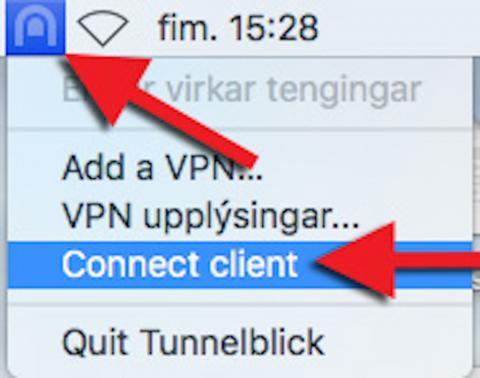
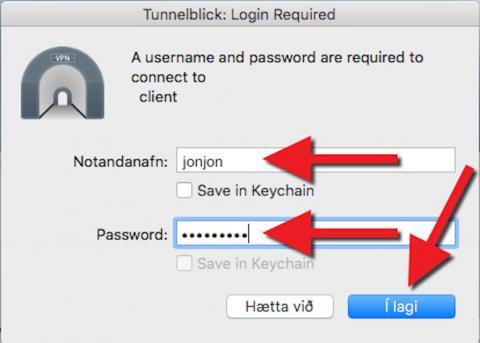
- Click on the Tunnelblick icon in the top right corner and choose "Connect client":
- Type in you username without @hi.is and password (same as for Ugla) and click on "OK":
And now you should be connected. Hurrah :D
- Start by downloading the Client file
- Go to network settings and click the plus by VPN
- Click "Import from file"
- Choose the client.ovpn file that you got in the beginning
- Give the VPN a name and put your username (without @hi.is) and your password and click "Apply"
- Now you can connect to VPN by moving the switch to the right
- After that you should be able to go to the network icon and connect to VPN
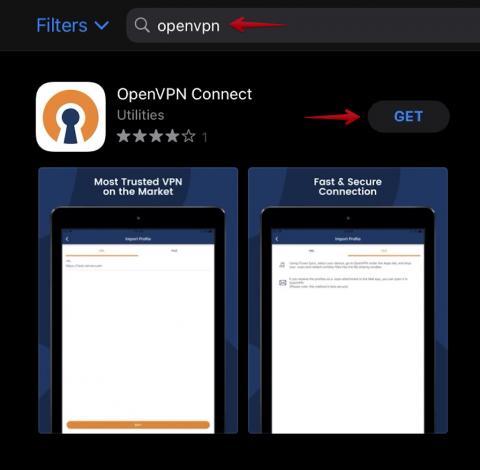
- Start by downloading "OpenVPN Connect" through the App Store:
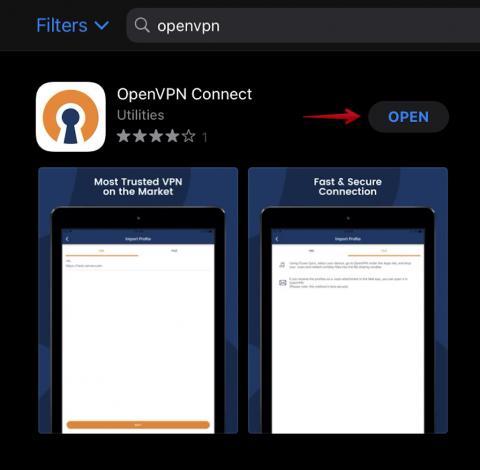
- Tap "OPEN" when the app has finished downloading:
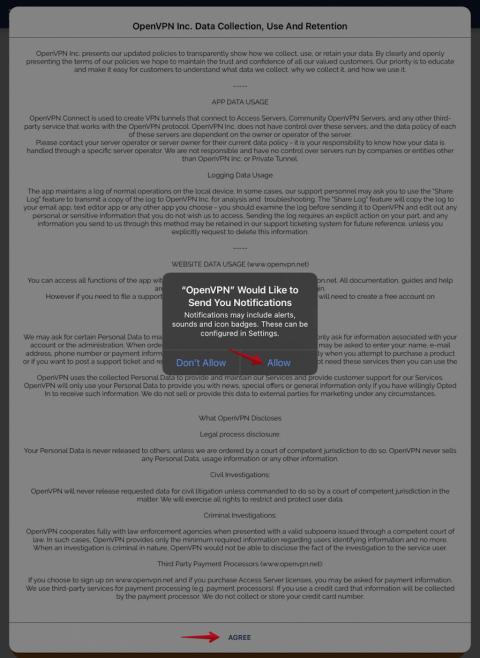
- Choose whether to allow notifications or not and agree to OpenVPN's terms:
- Next you need to download the client setup-file.
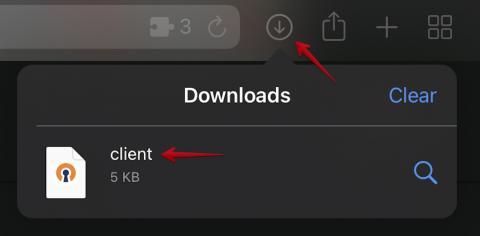
- Find the client file in Downloads on your browser. On Safari on the iPad you can find Downloads by tapping the symbol of an arrow in a circle. Tap on the name of the file to open it:
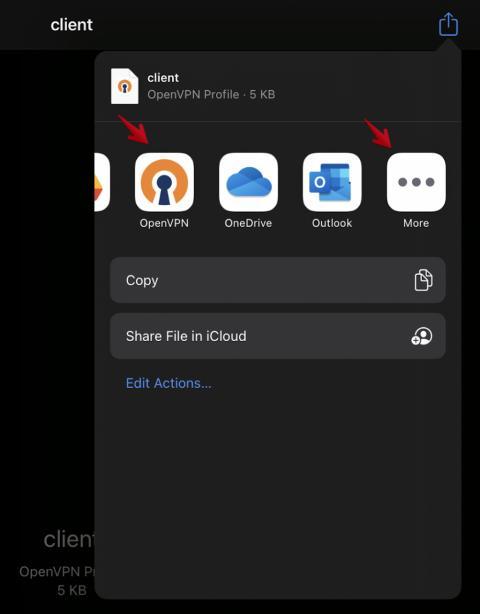
- You will get options for how to open the file. Find and choose OpenVPN in the list (you might need to tap on "More" to find it):
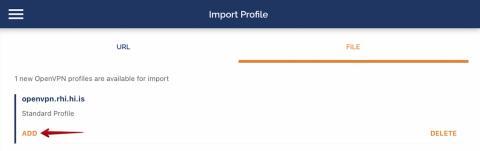
- Now OpenVPN will open with the profile. Tap on "Add.":
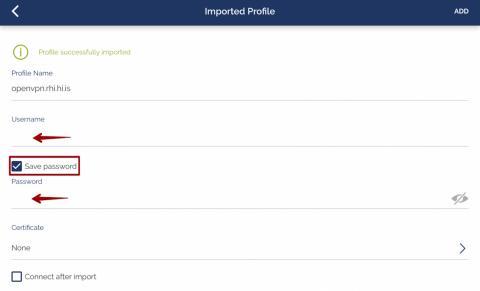
- Input your username (without @hi.is), tap on "Save password" and input your password. Tap on "Add" in the top right to save:
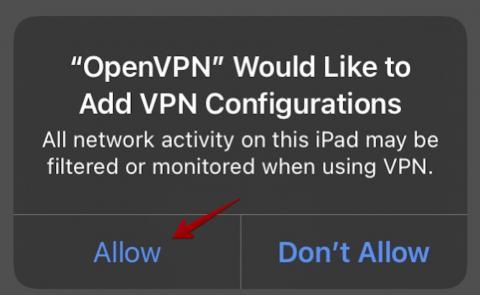
- You will get a pop-up where you need to allow OpenVPN to add configurations. Tap on "Allow" and input passcode if prompted:
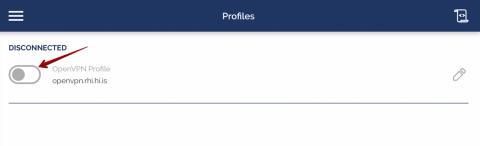
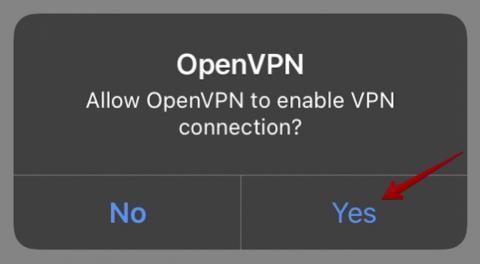
- The profile is now ready to connect in the app. Tap on the switch to connect and accept the connection:
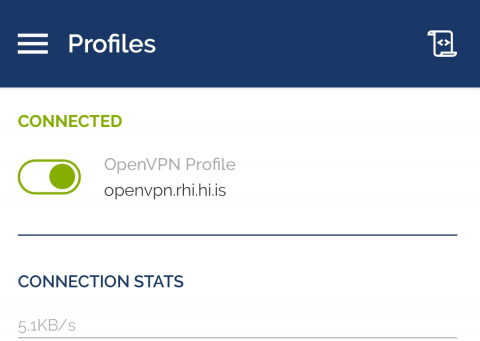
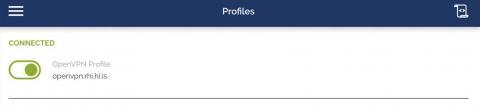
- The setup is now complete and the connection should be active:
- To connect to VPN in the future you can do it through the OpenVPN app:
Or by going through settings: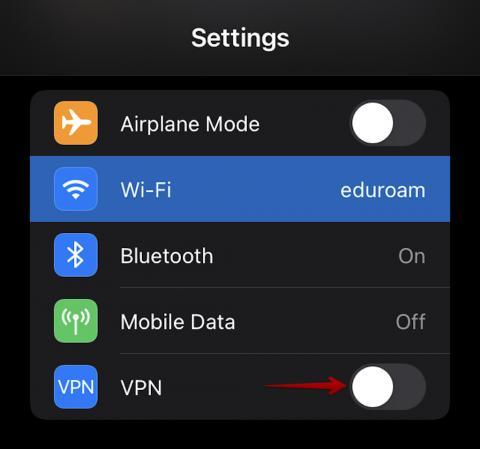
- To connect to the University network via VPN start by downloading the file you use in the setup:
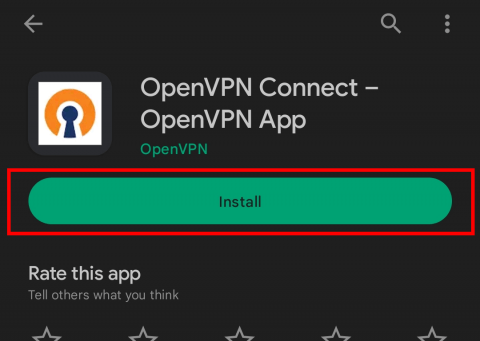
- Download OpenVPN Connect through the Play Store and open it once its ready:
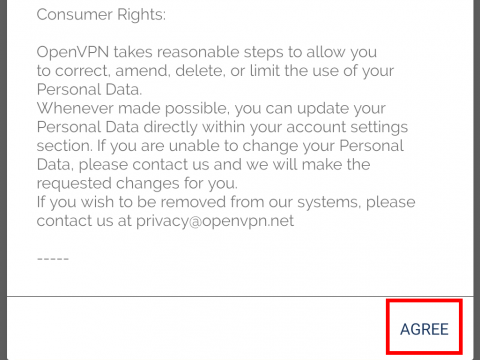
- Accept the terms of service:
- Choose "File" and then click "Browse"
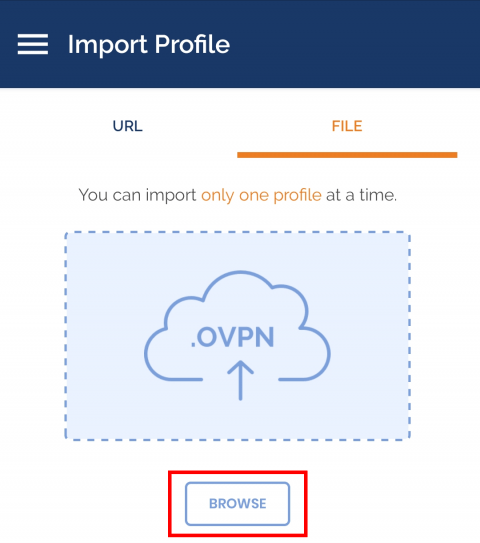
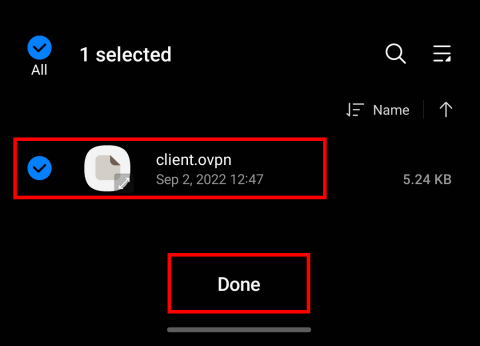
- Locate the Client File that you downloaded in step 1 and select it (search in downloads).
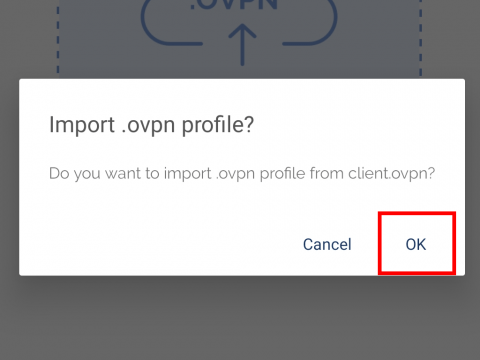
- Click "OK"
- Write your username (without @hi.is) and your password.
Select save password and enter your password
Click "ADD"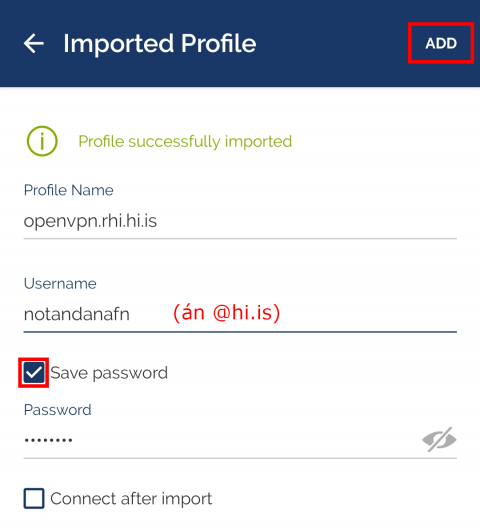
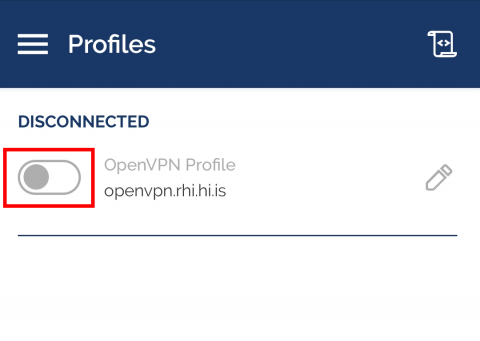
- Move the switch to the right to connect
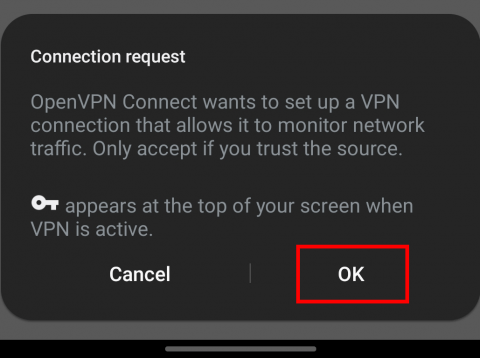
- Click „OK“
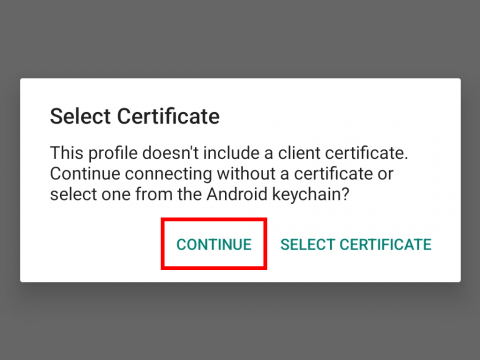
- Click „Continue“
- Now you should be connected to the VPN: