Calendar in Outlook

Outlook manages email, calendar, contacts, and more. Here, we focus on the calendar. The calendar is typically symbolised by a calendar icon on the Outlook toolbar:
Calendar layout and general settings
The Outlook calendar appears automatically in Outlook once your email has been set up. If you have not done so already, begin by setting up your UI mailbox in Outlook
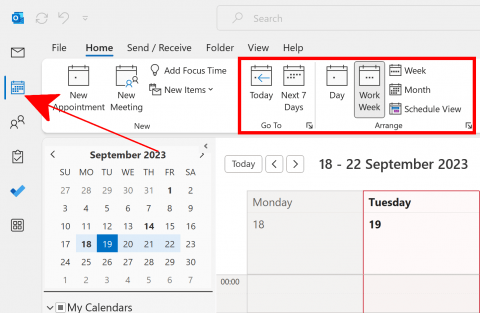
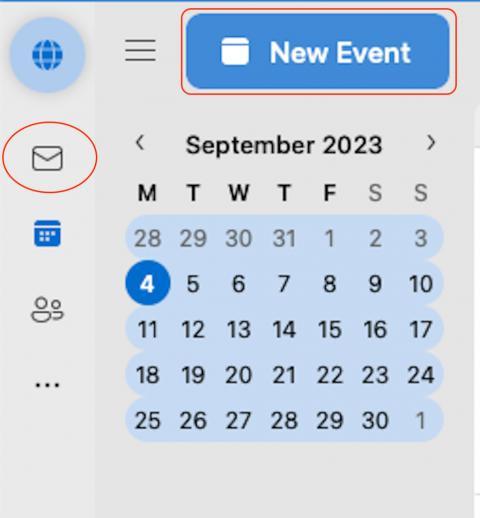
- To go to the Outlook calendar, click the small calendar icon in the top left corner of Outlook. It is possible to change the calendar layout (also referred to as 'view') with the buttons in the "Go To" and "Arrange" sections. We recommend choosing to view the next seven days, but you may want to try different settings to see which one suits you best:
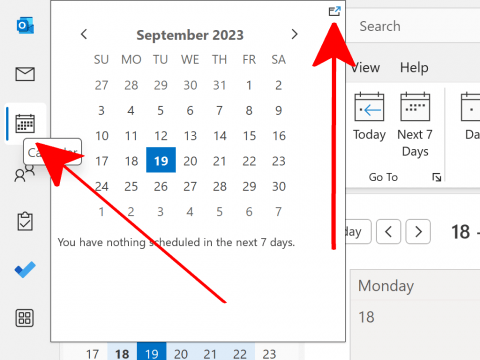
- If you want a quick view of the calendar and upcoming events, hover with the cursor over the calendar icon without clicking it. A window appears with upcoming events. You can click on the icon in the corner to view the calendar and mailbox simultaneously.
The Outlook calendar appears automatically in Outlook once your email has been set up. If you have not done so already, begin by setting up your UI mailbox in Outlook
- To go to the Outlook calendar, click the small calendar icon in the top left corner of Outlook:
- It is possible to adjust the calendar layout (also referred to as 'view') in the "Organize" tab. You can choose to view one day, the work week, full week, or month:
Calendar view
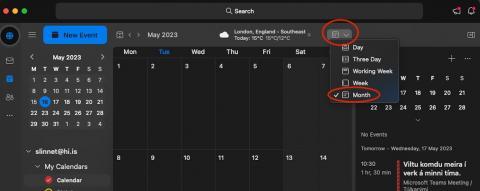
- You can select how many days you see in the calendar. Click on the icon next to the search icon in the top right:
- Here you can choose to view the calendar as an agenda, a month, or to view one or three days at once:

Visible calendars and calendar sharing
You can choose which calendars are visible and adjust settings for each calendar, such as sharing a calendar with others.
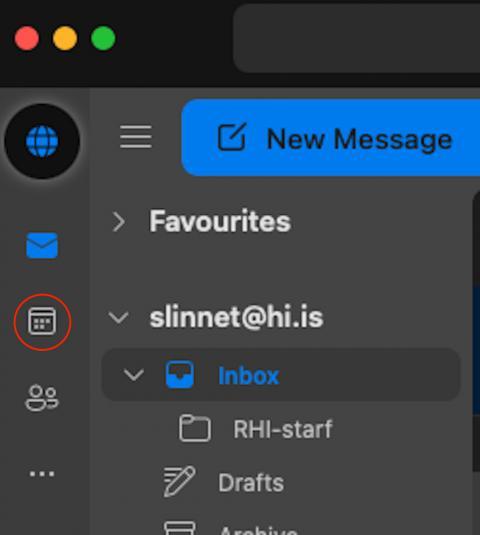
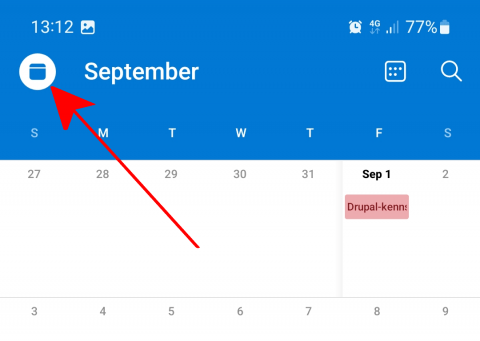
- Tap the top left icon:
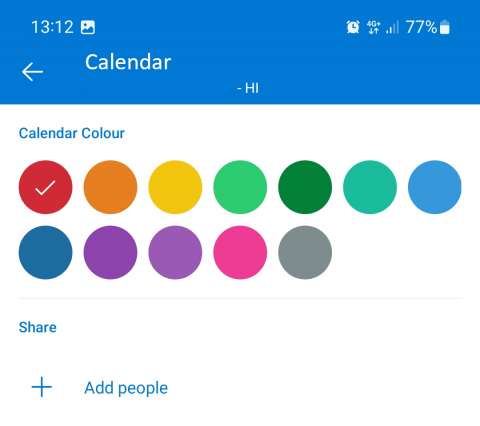
- Tick and untick the calendars you want to have visible/invisible in your calendar view. If you want to go to the settings for a specific calendar, tap the gear wheel icon to the right of that calendar.

- Here you can select a colour for the calendar and share it with others. To do so, tap "Add people". Then you can select whether the recipient can only view the calendar or whether they can also add events to the calendar, and so forth:
Notifications and other settings for the calendar app as a whole
- Tap the 'Hamburger' icon (three horizontal lines) in the top left:
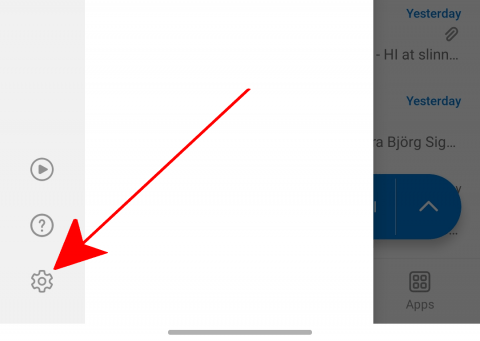
- Tap the gear wheel icon in the bottom left:
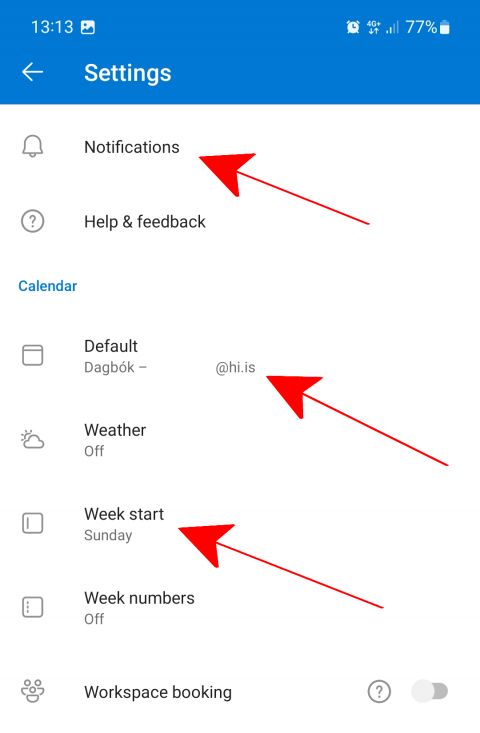
- Here you can adjust various Outlook settings. Scroll down the list to the calendar settings. Here you can select when to receive notifications, which calendar is selected by default when a new event is created (this can always be changed when setting up a new event), and what day of the week the week shall start in the calendar. In the current example, we select "Notifications":
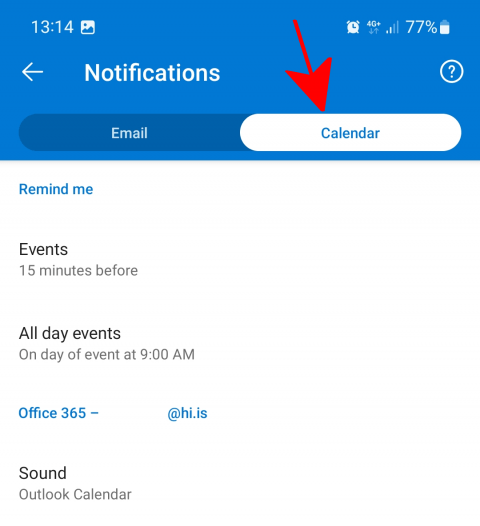
- Tap "Events" to select when to receive notifications about an event start. You can also choose whether or not to receive notifications from this account by clicking "Sound".
Below are some settings that can come in handy, such as how many days are displayed on the site, basic settings, and weather settings.
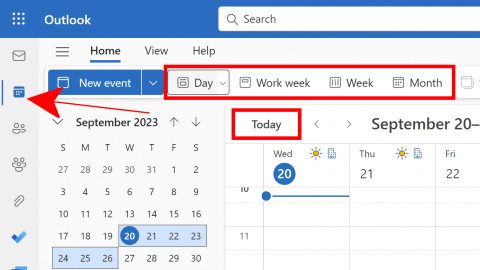
- To get to the calendar, begin by logging into outlook.hi.is and clicking the calendar icon at the top left of the site:
- You can set how much of the calendar is viewed on the page. Choose between one day, the work week, full week, or month. Click "Today" to go directly to the current day in the calendar. This can be useful if you have skipped many months forward/back in the calendar and want to return to the current day. The view you have selected remains unless you change it:
- You can find the calendar settings by clicking the gear wheel icon in the top right:
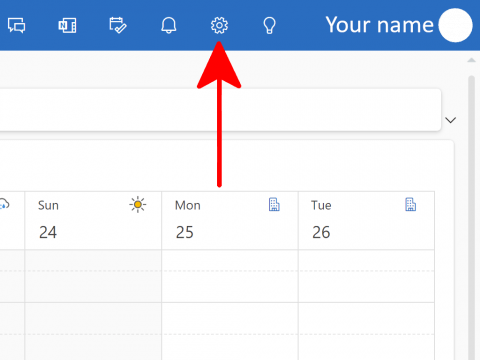
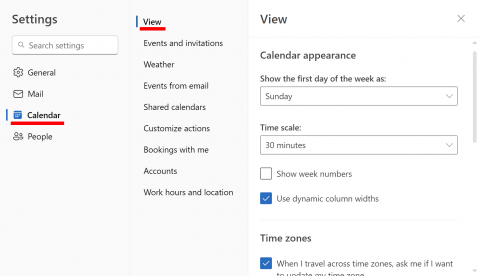
- In the settings you can choose the theme, weather and other options.
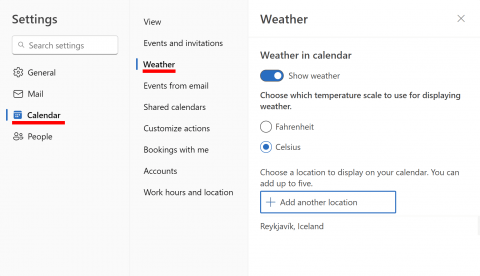
- In the weather tab you can select your location, show the weather in your calendar and Celsius:
New meeting
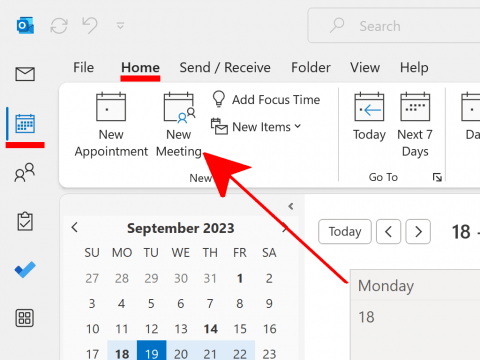
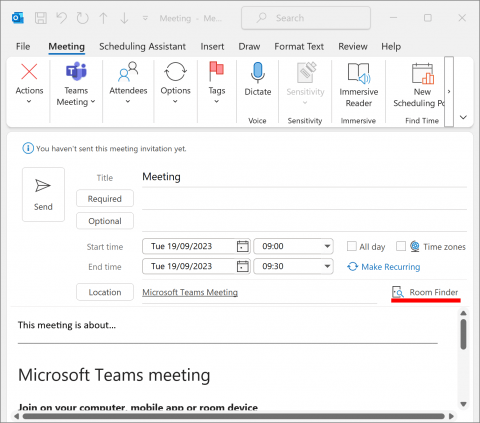
- When you want to create a meeting in Outlook select “New Meeting“.
- A new window will appear.
- Title: Give the meeting a name.
- Required: Add members who are required.
- Optional: Add members who are optional.
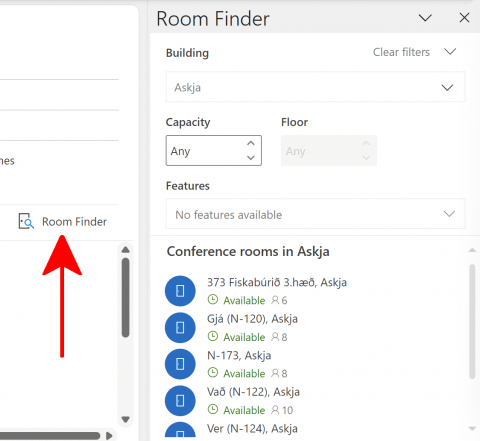
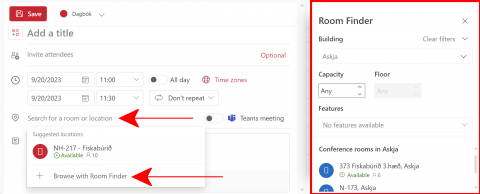
- Location: Here you can choose a room, you can use Room finder to look up a room and check if it is available or not.
- Room finder: See step 5.
- If you press the Required or Optional button you can use the Global Address List to look for students, staff or groups.

- If you press the Location button you can choose from the available rooms.

- On the right you can see “Room Finder”. You can use Room finder to book a room within the university. Choose a building, then you should see a list of rooms and if they are available or not. Remember to click on “Send” when everything is ready to finish the application. Everyone on the list will get an email and reply if they can come to the meeting or not.
- A link to the meeting will be created and people can use it to join the meeting or wait until the meeting is about to start and use the notification button. Always remember to click on send when the invitation is ready.
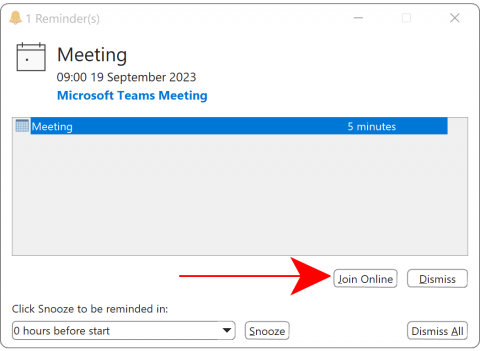
- When the meeting is about to start you will get a notification, click on “Join Online” to open up Teams.
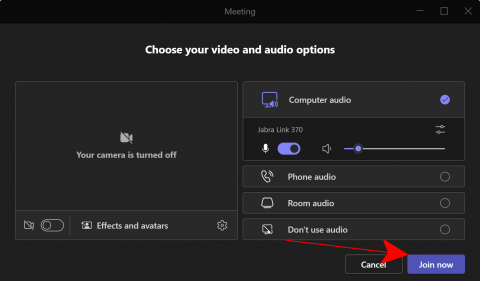
- Teams will open and you can click on Join now to enter the meeting.
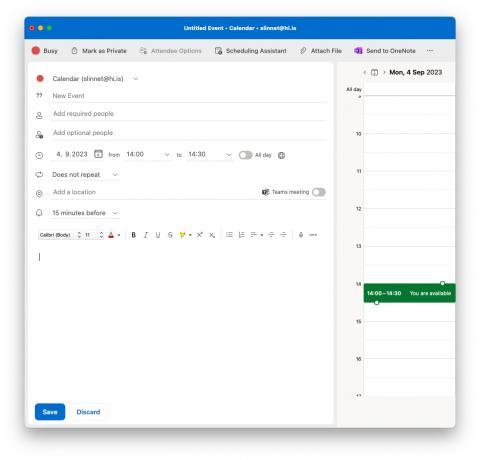
- This is how to set up a meeting. Click on calendar and "New Event":
- Put the email addresses of the people you want to invite. If the person is in your contact list, they ought to appear when you start typing their name or email address. Use the "New event" field to give the event a name/title. Fill in "Location" and then choose a time and date for the meeting. You can slide the Teams meeting slider if you want the meeting to be accessible online:
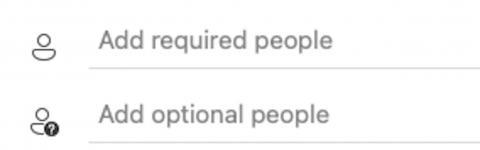
- Required people are required to show up. Optional people can attend the meeting if they want to.
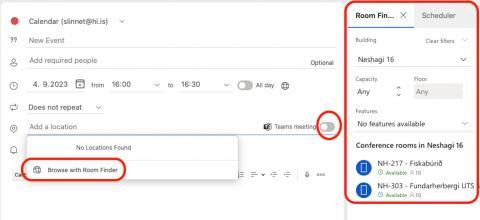
- If you click on "Add a location" and then select the "Room finder" you can get a better idea of available rooms and the capacity of the rooms.
- Fill in the description of the meeting and click "Save" when you are done:
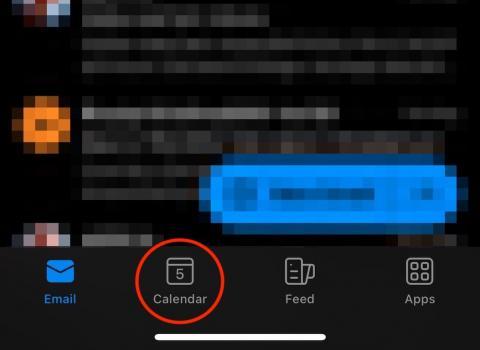
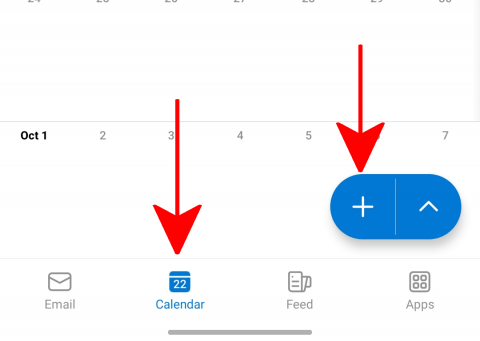
- Tap the calendar icon at the bottom right of your screen:
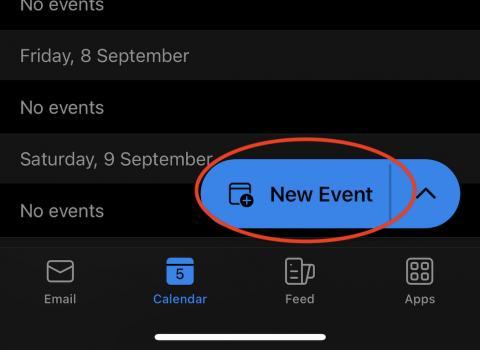
- Select New Event:
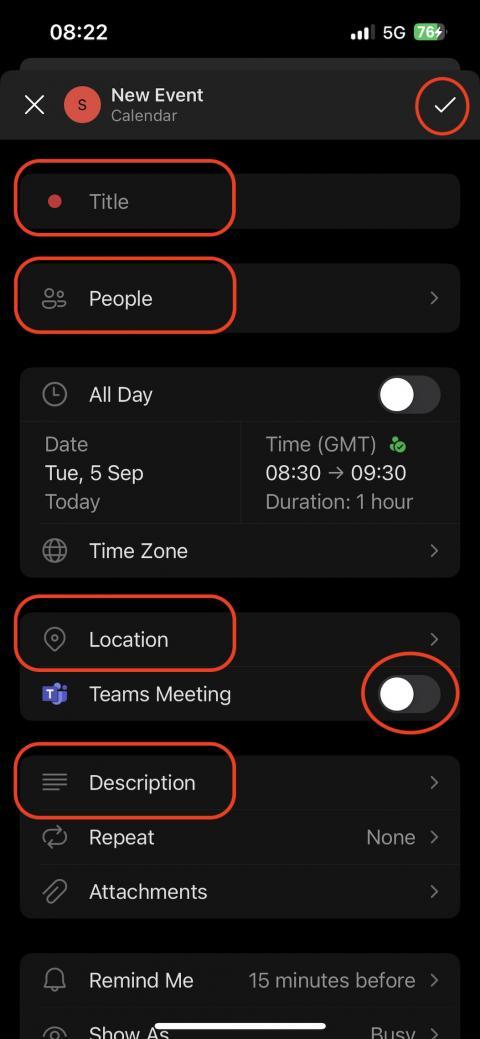
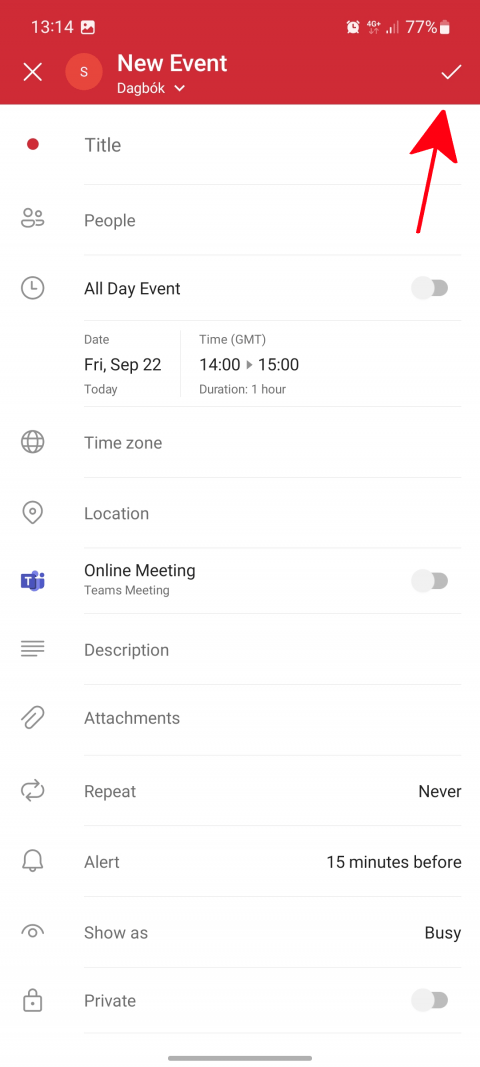
- Give the meeting a descriptive title. You can now add people to the meeting. Set the time and date. Add a location. If the meeting will be available through Teams then select teams and fill in the other fields as applicable. When the meeting is set up correctly, tap the tick mark in the top right corner to save it:
Setting up a meeting on an Android device is effectively the same process as setting up an event. The only difference is that in this case you add users to the event, thereby making it into a meeting.
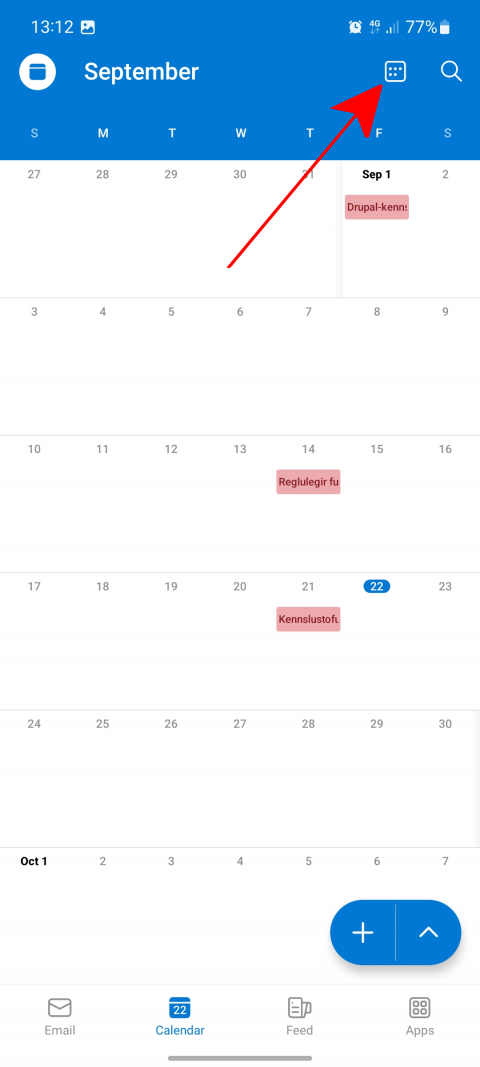
- Tap the calendar icon at the bottom. Tap the plus sign to create a meeting.
- Give the event a descriptive name. You can now add people to the event. Set the time and date. If people are free at the time of the event, a green user icon with a tick mark should appear; if people are unavailable, a red user icon with an X should appear. Add a location and fill in the other fields as applicable. When the event is set up correctly, tap the tick mark in the top right corner to save it:
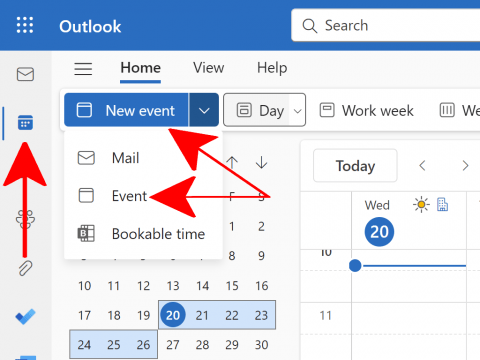
- In a web browser, the same process is used for setting up events and meetings. Start by opening the calendar in the top right corner and select "New event":
- If you add attendees or a location then the event becomes a meeting.
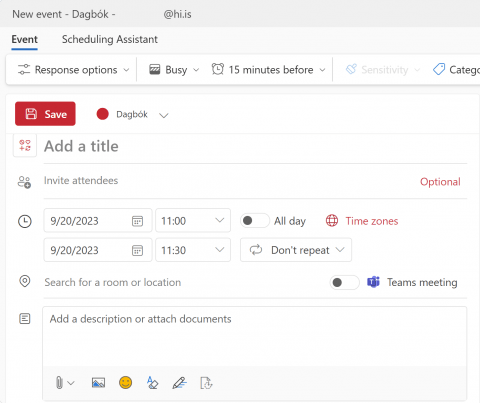
- Here you create the meeting.
- Title: Give the meeting a title.
- Invite attendees: By default all attendees are required to attend the meeting. You can select "Optional" to add optional attendees.
- Time and date: Select the time and date.
- Location: Here you can select a location or meeting room.
- Teams meeting: Check this if you want to stream the meeting.
- Description: Here you can describe the meeting.
- If you select "Browse with Room finder" you can get a better overview over all available rooms and the capacity of those rooms.
- Send the meeting request by clicking "Send".
Now all attendees have received an invitation to the meeting, in their inboxes and calendars.
New event
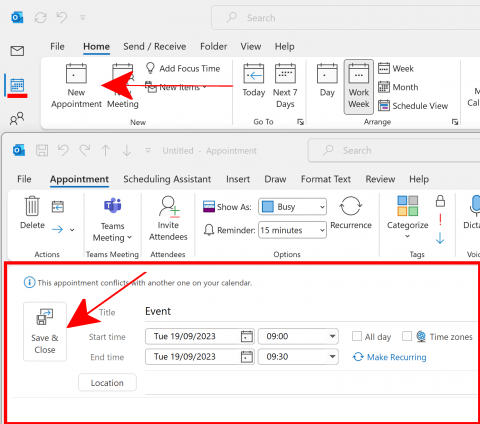
To add a new event to the calendar which is only intended as a reminder for yourself rather than a meeting to which you want to invite others, it is best to select "New Appointment".
Type a descriptive name for the event under "Subject", add the "Location", and select the date and time for the event. You have the option of adding a more detailed description in the box at the bottom. You can change your availability as it appears for others under "Show as:". By default, you will appear as "busy", since there is an event in the calendar (i.e. the appointment you just created). Once the event is set up as needed, click "Save & Close". The event will then appear in your calendar:
- To add a new event to the calendar which is only intended as a reminder for yourself go to calendar and select "New Event":
- Type a descriptive name for the event under "New event" and select the date and time for the event. You have the option of adding a more detailed description in the box at the bottom. You can change your availability as it appears for others under "Show as:". This helps when others want to try and schedule a meeting with you. They see immediately whether you are available or busy. By default, you appear as "Busy". Once the event is set up as needed, click "Save & Close". The event will then appear in your calendar:

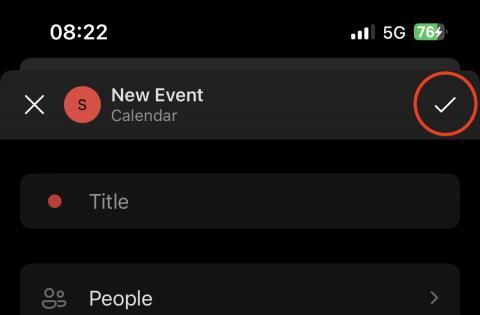
- Tap the calendar icon at the bottom right of your screen:
- Select New Event:
- Give the event a descriptive title. Set the time and date. If you add people or a location to the event then it will become a meeting. When the event is set up correctly, tap the tick mark in the top right corner to save it:
- Tap the calendar icon at the bottom. Tap the plus sign to create an event.
- Give the event a descriptive name. If you add people to the event it will change into a meeting. Set the time and date. If people are free at the time of the event, a green user icon with a tick mark should appear; if people are unavailable, a red user icon with an X should appear. Add a location and fill in the other fields as applicable. When the event is set up correctly, tap the tick mark in the top right corner to save it:
The difference between an Event and a Meeting is that the event is just for you while meetings are for more than one person. Here below we will create an Event:
- To add a new event open outlook.hi.is, select the calendar and then click on "New event":
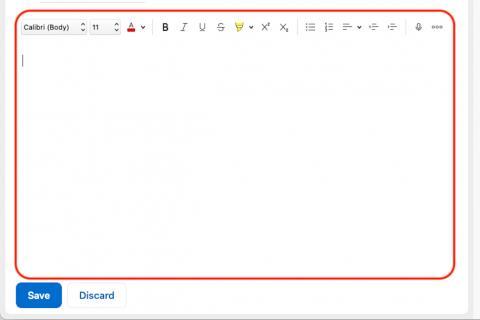
- Give your event a descriptive title and add the location. Set the time and date for your event. You can add a more detailed description in the large box at the bottom, or add attachments by using the "Attach" button at the top.
- If you add more people to the event under "attendees" or you add a meeting room in the location the event will turn into a meeting.
- When the event is set up correctly, click "Save" in the top left corner:
Now your event will show up in your calendar.
Scheduling assistant
Below are instructions for booking a room and people for a meeting and making sure that everyone is free at the same time.
- When you have clicked on "New Meeting", you can click on "Scheduling Assistant" at the top. The size of the window affects the appearance of the button:
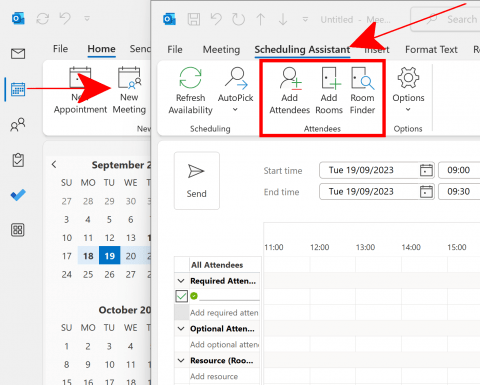
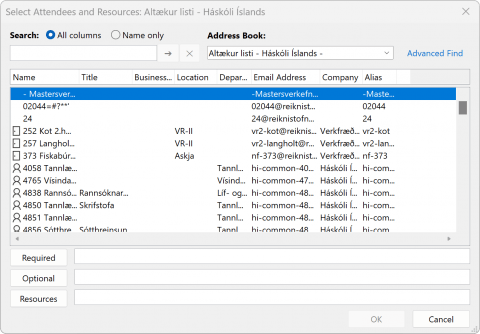
- Start by adding attendees. You can write their email addresses in the name field and click Enter, but it can be easier to click "Address Book" or "Add Attendees":
- Find an attendee by writing their name in the field. The list will narrow down as you type.
- You can change address book if you have more than one using the drop-down menu under "Address Book".
- Select an attendee and click "Required" if the person is required to attend the meeting or "Optional" if they can choose whether to attend or not. The person will then be added to the field on the right. You can repeat this step as often as necessary until you have added everyone who is invited to the meeting.
- When you have finished adding everyone click "OK":
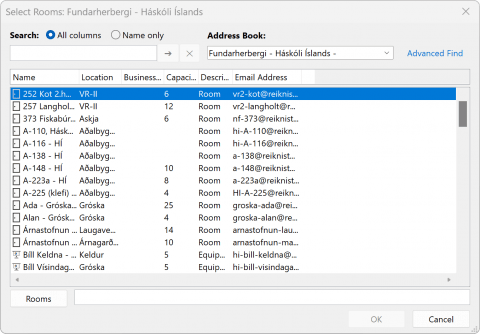
- Now add a meeting room. Use the drop-down menu under "Show a room list" on the right and select the correct building, or click "Add Rooms" in the bottom left corner. Meetings rooms are then added to the list. Select the room you want from the rooms available:
- Now choose a meeting time that will work for everyone. You can zoom in or out using the field in the top left. You can also use the slider at the bottom to see the times and dates further in the future. When you find a time that suits everyone and when the meeting room is free, you can click on the field to mark the time. You can change the length of the meeting by clicking and dragging the end of the blue box. You can also use the fields below, "Start time" and "End time":
- Click "Send" when everything is ready:

Below are instructions for booking a room and people for a meeting and making sure that everyone is free at the same time.
- Create an event through outlook.hi.is:
- It is best to start by giving the meeting a name and choosing a provisional time and meeting room. Then click the "Scheduling Assistant" button in the top left:
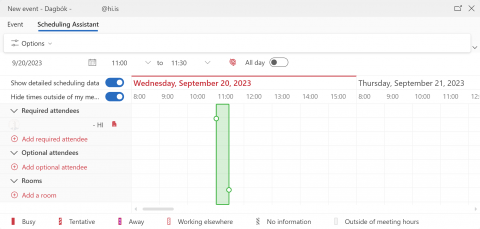
- Add attendees by typing their names in the fields "Required" or "Optional".
- You can see who exactly is busy and at which time they are free. Click a field that is completely white to select a time when everyone is free .
- Go back to "Event" and click „Send“ when everything is ready:
Meeting invite based on email
If you open an email and want to organise a meeting, inviting all email recipients, the process is simple. In Windows:
- In the email interface in Outlook, under the Home tab, you can create a meeting request based on an email. Select the email and click "Meeting":
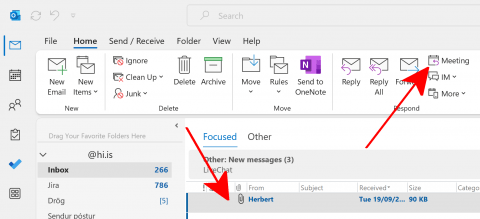
- Everyone on the email's recipient list is then automatically added to the meeting request. You can find more information on organising meetings above.
If you open an email and want to organise a meeting, inviting all email recipients, the process is simple:
- Select the email, click on the three dots in the top right corner of the email, click on "Other reply actions" and then "Reply all by meeting":
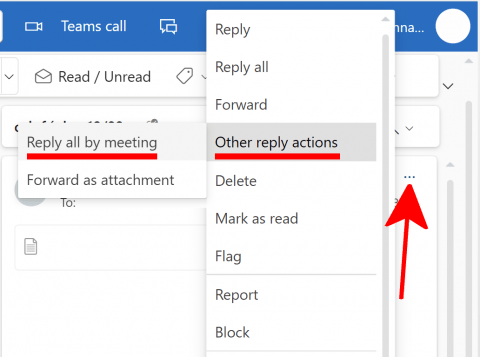
- All email recipients are added automatically to the meeting. You can find more information on meetings above.
Integrating other calendars
This is how to add a Google calendar to Outlook. The same process applies to other calendars with an iCal link. (step 4).
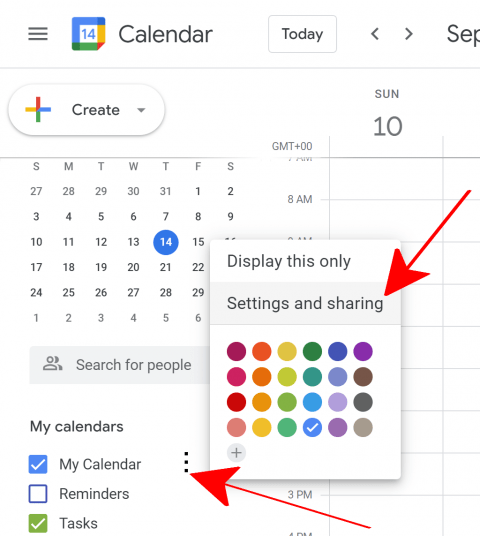
- Open your Google Calander.
- Click on the three dots behind the calendar name you wish to import to Outlook and select "Settings and sharing":
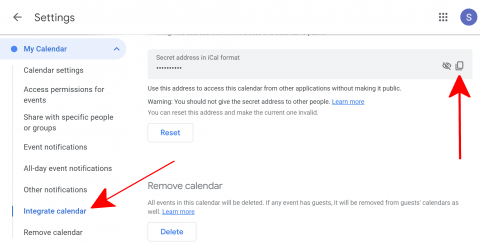
- Go to "Integrate calendar", right-click on the link under "Secret address in iCal format" and click "Copy":
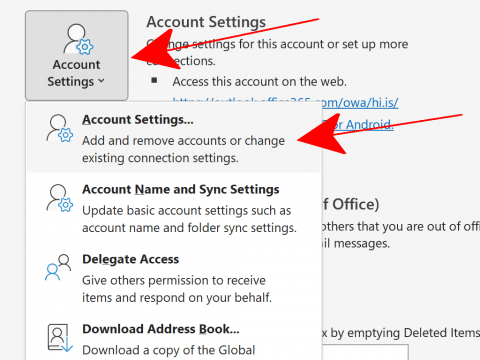
- Open Outlook. Click on the "File" tab:
- Click on "Account settings" and then again on "Account settings" in the drop down menu:
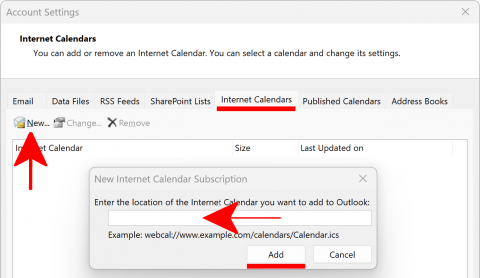
- Now this window opens. Click "Internet Calendars" and then "New":
- This is where you should paste the link that you copied in step 3. Then click "Add":
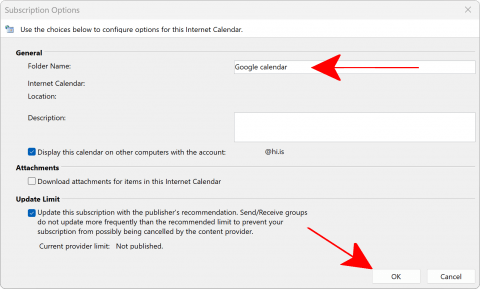
- Give the calendar a name in "Folder Name" and click "OK":
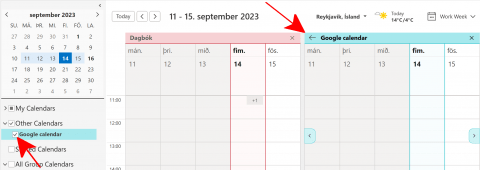
- The calendar is now integrated. Your calendars will appear side by side, but if you want to combine them, click on the arrow in front of the calendar name:
You can repeat these steps for all the calendars you want to use in Outlook.
The best way to integrate an iCal calendar, such as a Google calendar, into Outlook in MacOS is to use the browser interface. You can find instructions below.
The best way to integrate an iCal calendar, such as a Google calendar, into Outlook on an iPhone or iPad is to use the browser interface. You can find instructions below.
There are two ways to add an iCal calendar, such as a Google calendar, to Outlook in Android. You can do it in a browser, one calendar at a time, as demonstrated below, thereby adding them on all other devices.
It is also possible to add a Google account directly to Outlook on Android, giving you access to both Gmail and Google calendar in Outlook.
This is how to add a Google calendar to Outlook. The same process applies to other calendars with an iCal link.
- Open your Google Calendar.
- Click on the three dots behind the calendar name you wish to import to Outlook and select "Settings and sharing":
- Go to "Integrate calendar", right-click on the link under "Secret address in iCal format" and click "Copy":
- Open outlook.hi.is. Log in with the UI email address and password.
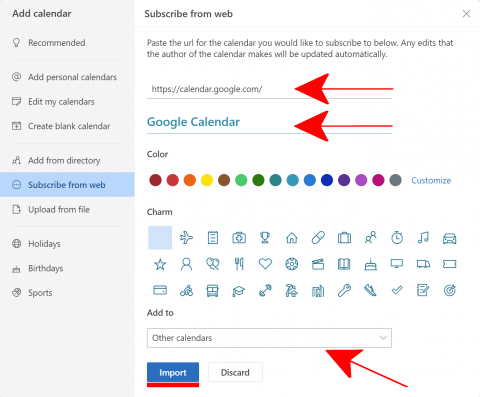
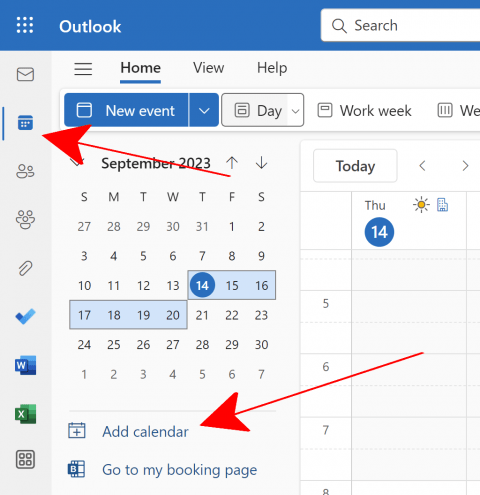
- Go to the calendar by clicking the calendar icon in the bottom left. Then click "Add calendar" and choose "Subscribe from web":
- Here you should do the following.
- Paste the link that you copied from the Google calendar in step 3 to the field.
- Give the calendar a name in the "Calendar name" field.
- You can customize the color and the icon of the calander.
- Choose where the calander appears under "Add to".
- Finally, click "Save" in the top left corner and the Google calendar should appear in your browser. Note though that you cannot add new events from Outlook to your Google calendar and the calendar can take a while to synchronise.